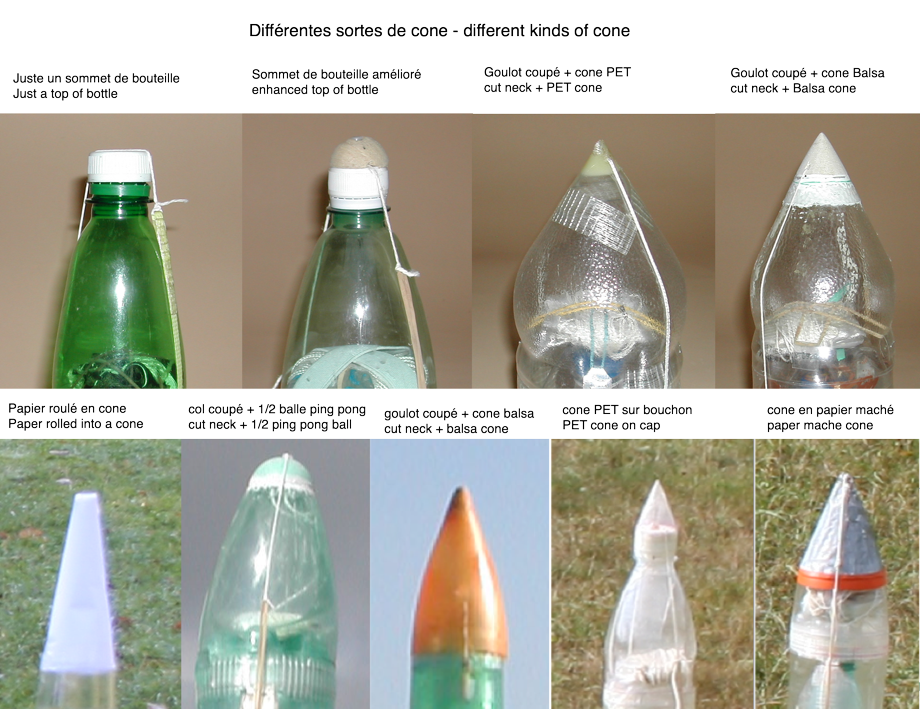
The nose cone
The simplest cone is to use the top of a bottle. But the neck + cap part is not very aerodynamic and we can improve things a little, in particular by placing an "overbone" on it.
The more daring, will risk cutting the neck with a hacksaw because at this point, the plastic is thick and cannot be cut with a cutter.
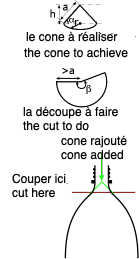
With the neck removed or not, it is necessary to place on the main cone, the small cone that can be made from balsa wood turned on a drill, or strong cardboard or PET.
In these last two cases, it is necessary to know the radius r of the base and the height of this small cone or the angle between the generatrices of the cone and the base plan.
In this case, we can calculate a = r / cos (alpha) or a = square root (r2 + h2), which will be the minimum radius of the sector of the circle to be cut (it is necessary put a few millimeters more to glue the mini cone on the large cone). The beta angle of this sector will be beta = 360 * cos (alpha) in degree (figure below).
Another method of making a cone (whole or partial like above) is to use newspaper coated with glue tapestry. However, if possible an external mold is needed. for example we can take a cone made as before which will be used as a mold. Inside, we pass a little petroleum jelly (for the release from the mold) then we have the strips of newspaper cut to the hand (therefore irregular) and brushed with tapestry glue until cover the entire surface of the mold. We repeat the same operation for a second layer, then possibly a third, or even a fourth ... But watch out for thickness and weight. With the making a mold, we can thus make cones of any shapes and all sizes.
Here are some examples of cones in the image below.